GoalEnforcer for Apple iOS can run on any smart phone or tablet running Apple iOS 6 and higher. It's a simplified version of GoalEnforcer for desktop (Windows and Mac), which has been optimized for the small screen and touch interface. You can share and sync your projects between desktop and mobile by using the GoalEnforcer Cloud.

Visual Goal Map
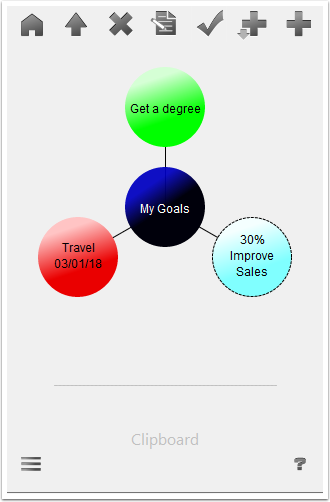
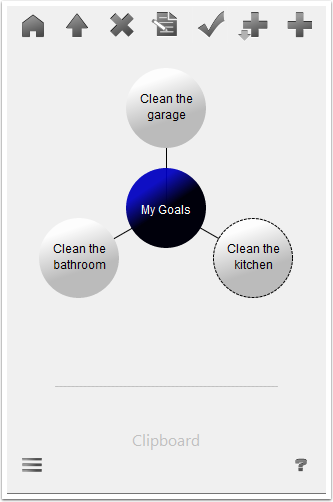
Once you start your app you should see the visual goal map editor with your top level goals.
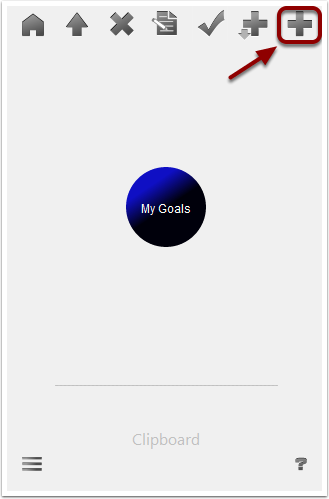
Add goals
Tap the "Add Goal" button (+)
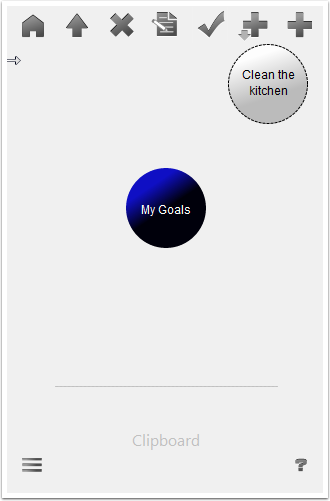
Name your goal
Tapping the "Add Goal" button will create an object that represents your goal. Go ahead and name it using the keyboard. Hit Enter (Return) or just touch anywhere on the screen when you are done typing.
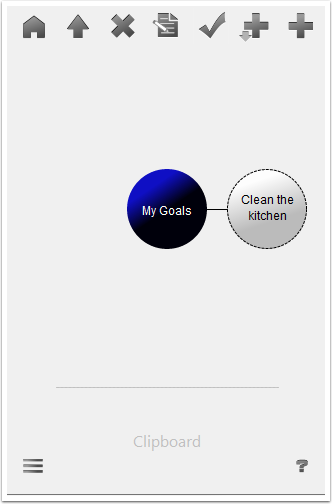
Drag your goal
Drag your recently created goal closer to the central blue circle. This will create a link connecting your core goal "My Goals" to your sub-goal "Clean the kitchen." GoalEnforcer helps you by continuously breaking your big hairy goals into simpler and more achievable sub-goals, so get used to this process,
Create more goals
Create more top level goals using the same process mentioned in the previous sections. We recomment you create a maximum of 7 goals per level, so that your map doesn't get cluttered.
Break goals
This is the most important thing you can do with GoalEnforcer, which is really going to help you. You'll break goals into smaller sub-goals! You will continue doing this process of breaking goals into sub-goals, then breaking sub-goals into even smaller sub-goals ... until they get so small that they become executable. That's a task. An action that you can execute to achieve a goal.
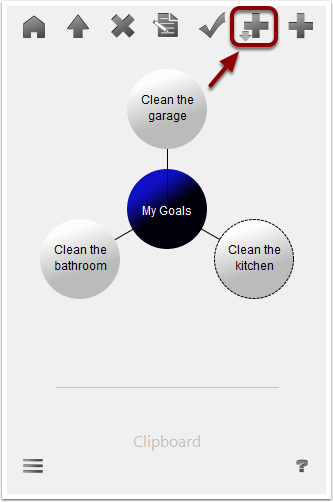
In order to break goals into sub-goals: first select it but just tapping on it, then tap the (+) button that has a down arrow. This is the "Break it into sub-goals" button.
Add sub-goals
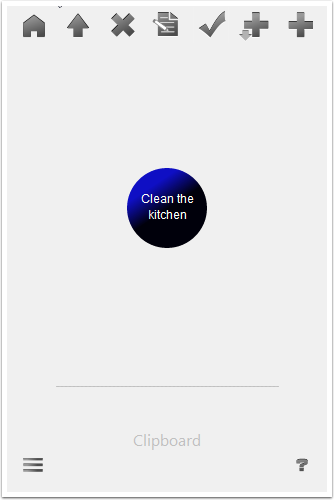
Once you tapped the "(+) down arrow" button, as mentioned on the previous section, you'll move into the goal sub-space, Imagine it as diving into a goal to see what it is made of. This will help you focus on this specific goal. Think how you can break it into sub-goals.
Notice that your top level goal now becomes the central blue circle "Clean the kitchen." Add sub-goals to this goal by tapping the "Add Goal" button (+ without an arrow), like you did it in the previous "Adding goals" section.
Execute your plan
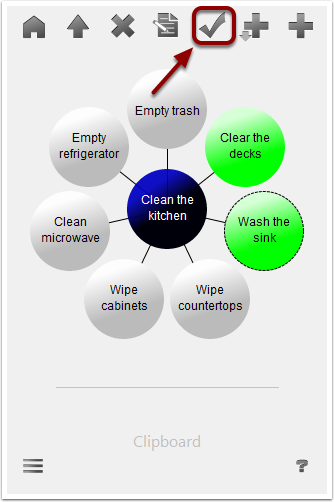
Now that you broke your large goal into smaller sub-goals that can actually be executed (tasks), you can start working on your tasks and have the pleasure to checkmark each task as completed. To do that: select a task by tapping on it and then tap the "Checkmark" button.
Important note: you can only checkmark things that you can execute, such as "tasks." You need to checkmark all your tasks in order to have your goal achieved, you cannot checkmark your goal directly.
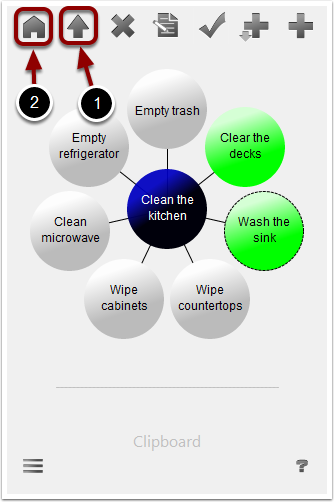
Navigate up
Navigation is very similar to a web browser. Tap the "Go Up" button #1 (up arrow) to leave the goal sub-space and get back to the upper level. The "Home" button #2 will take you straight to the uppermost level.
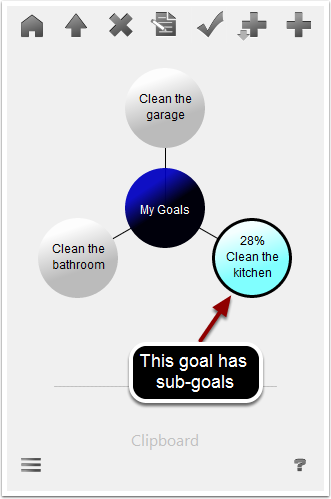
Dive into
If you see a goal with a blue ring around it, that means it has sub-goals (or tasks). You can dive into it to see its sub-goals by double tapping on it. As if you were following a link on the Internet.
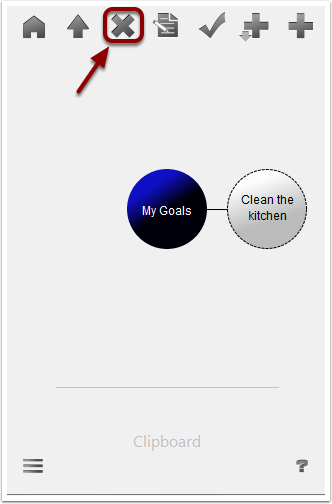
Deleting goals
Select a goal by tapping on it, then tap the "Delete" (X) button.
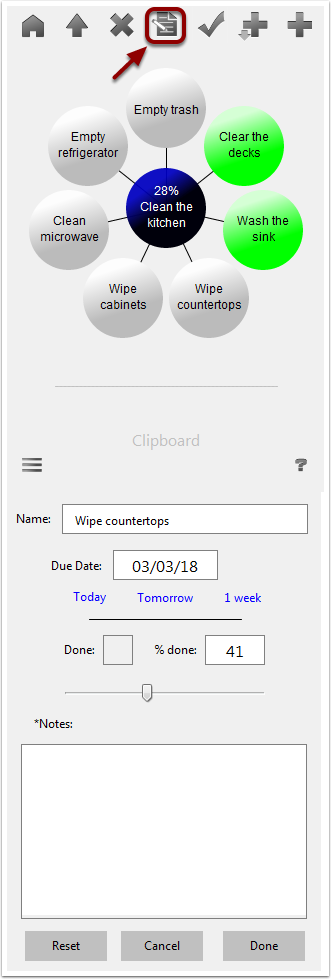
Set dates, progress and notes
Select a goal/task by tapping on it, then tap the "Edit" button. You can achieve the same result by simply touching and holding the goal/task object still for 1 sec.
Color Codes
- Green: done!
- Blue: currently working on it, on time.
- Yellow: task due today.
- Red: overdue!
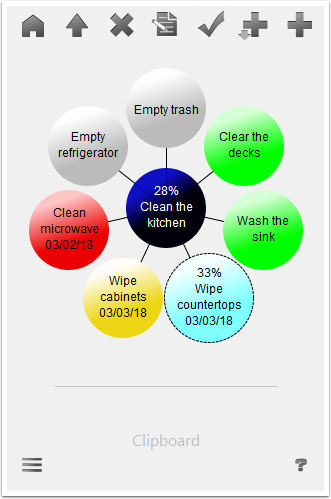
Sequence
Order of execution follows the same order as hours in a clock. Going clockwise, you shoud start with the one o'clock task, and so on. You can change the order by dragging tasks to other positions.

Moving goals across levels
Suppose you want to dettach "Empty trash" from its current "Clean the kitchen" parent goal, and attach it to another parent goal, e.g. "Clean the garage." You can easily move this task across your project by using the "magic" Clipboard area.
- Drag "Empty trash" and move it to the Clipboard area.
- Tap the "Go Up" button to navigate back to the top level.
- Once in the top level you can see that "Empty trash" remains in the Clipboard area,
- Double tap "Clean the garage" to dive into its sub-space.
- Drag "Empty trash" out of the Clipboard area and move it closer to "Clean the garage" until they get connected!

Project navigator
- Tap the "Menu" button on the lower left corner of the screen. Select "Project Navigator" once the menu opens up.
- Once the "Project Navigator" is open you'll see your current project hilighted in yellow.
- You can add more projects by tapping the (+) button.
- Tapping on the "three dot" button will give you the options to "Rename" or "Delete" your project.

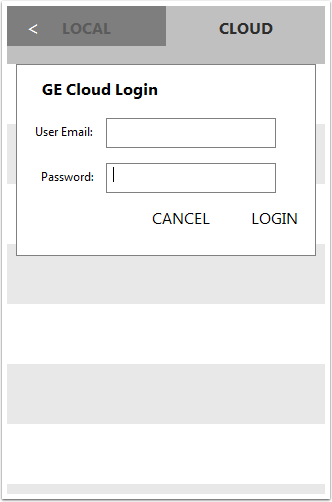
GoalEnforcer Cloud
You can use the GoalEnforcer Cloud to sync your projects between your Apple iOS mobile device (phone or tablet) and your desktop computer (Windows or Mac). Tap the "CLOUD" tab and enter your GoalEnforcer Cloud login credentials. For more details check GECloud.
GoalEnforcer Visual Goal Setting Software for Windows, Apple MacOS and now Apple iOS
For further GoalEnforcer help check our main website at www.goalenforcer.com
For customer support questions please contact support.